CORE RECIPE · 12 MIN READ
Homemade Bone Broth for Recovery
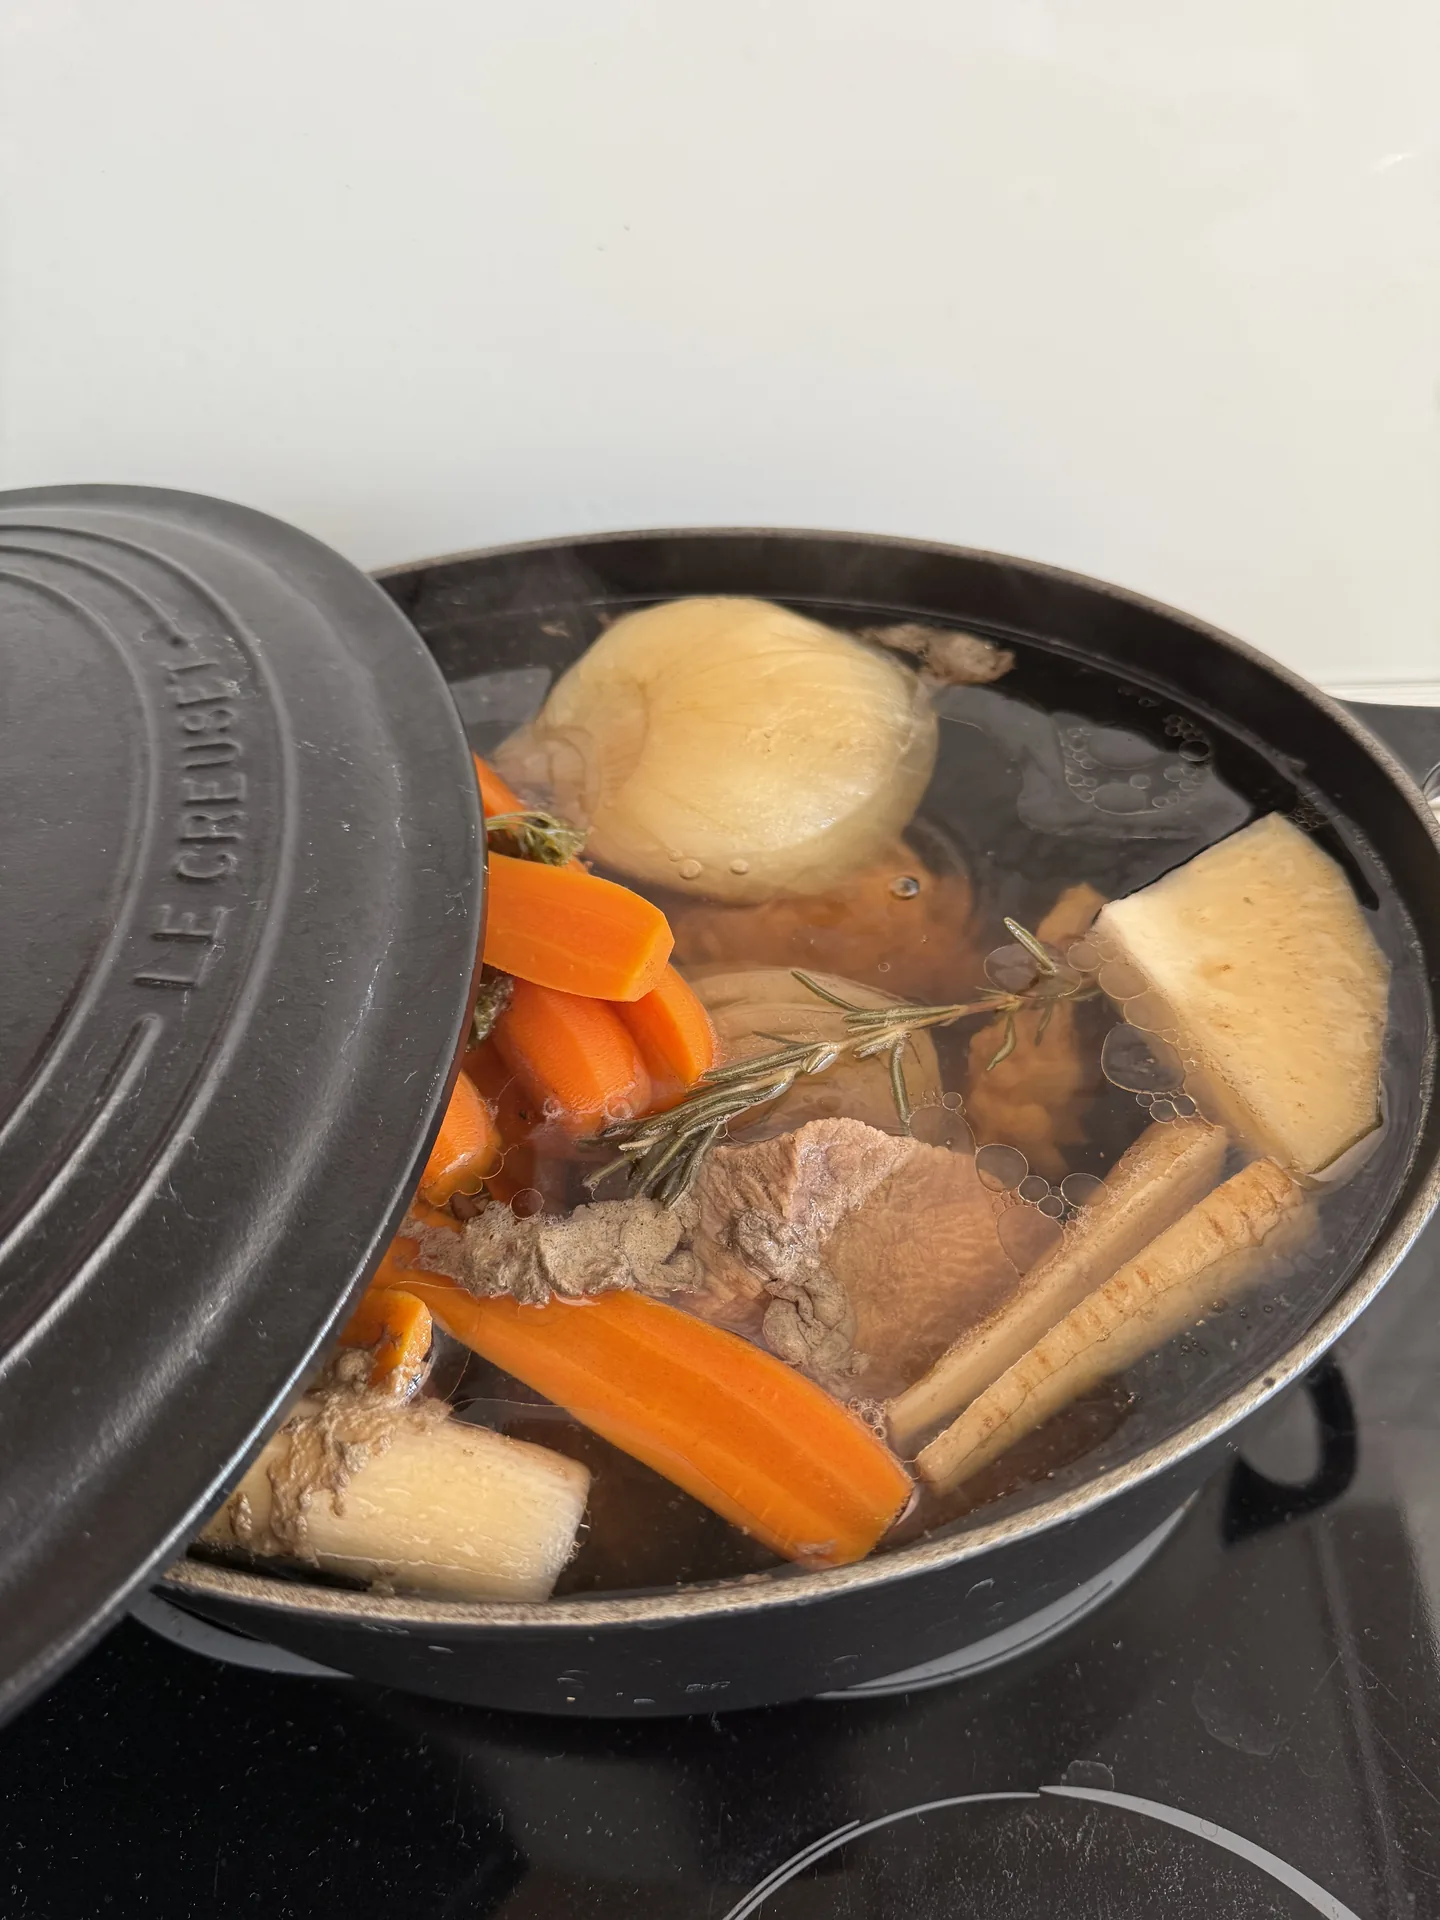
Slow-simmered bone broth is a warm, savoury base that I prepare in a large batch to use over several days as a pre-meal drink and as the foundation for vegetable dishes. I also often use it to make slow-cooked beef, which features on my menu almost every week.
Why I make it
A warm base for several days
I prepare homemade bone broth in a large batch so that I do not have to cook a fresh base every day. I usually drink it as a warm, savoury drink before lunch and dinner, and I also use it for soups, sauces and vegetable purées. I often cook beef in it as well.
A cup of broth contributes to daily fluid intake. When salted, it also contains sodium—an electrolyte involved in regulating body fluids. Because the amounts of sodium and other minerals in bone broth are not standardised, we do not present it as a balanced electrolyte drink. When using larger amounts of salt, total daily intake and individual restrictions should be considered.[1][2]
The recipe at a glance
Yield, preparation and cooking
- 01Prepare the bones
Roast the beef bones; chicken bones can be added directly.
- 02Simmer gently
Cook the bones, water, vinegar and selected additions at the barest simmer.
- 03Strain and cool
Adjust the salt at the end, then cool the broth quickly in shallow containers.
- 04Portion by use
Prepare portions for drinks, vegetable dishes and slow-cooked beef.
Shopping list
Ingredients and equipment
Base for ~3–3.5 l of broth
Aromatic version
- 1 medium onion (~110 g), halved
- 2 medium carrots (~150 g), roughly chopped
- 2 celery stalks (~100 g), roughly chopped
- ½ small celeriac (~200 g), roughly chopped
- 1 garlic clove (~5 g), lightly crushed
Stricter keto version
Omit the onion, carrots and celeriac. Use the bones, water, vinegar, salt and spices; add garlic and selected herbs if desired.
Meat is not a required ingredient in the basic homemade bone broth. I generally do not add it at the beginning because I want to prepare a versatile base first.
Equipment: a baking tray, a large enamelled cast-iron or other non-reactive heavy pot, a spoon for skimming, a fine-mesh sieve and shallow containers for rapid cooling.
Good to know
Different bones perform different roles
Beef marrow or long bones contain bone marrow and can create a richer, fattier flavour, but they do not guarantee that the chilled broth will gel. Parts containing more cartilage and connective tissue are particularly useful for producing more gelatine. Meaty bones, meanwhile, contribute a more pronounced beef flavour. No single type of bone is therefore inherently best: choose according to the desired flavour, amount of fat and texture.[3][4][5]
Step by step
Method
- 1
Roast the beef bones
Preheat the oven to 200 °C. Arrange the beef bones in a single layer on a baking tray and roast for 20–30 minutes, until well browned. Chicken bones can be added directly to the pot. Blanching is optional; use it only if you want to remove more surface impurities and achieve a clearer appearance.
- 2
Prepare the base
Transfer the bones to a large pot. I cook my bone broth in a large enamelled cast-iron pot. Add 4 l ice-cold water and 15–30 ml apple cider vinegar, then leave to stand for 20–30 minutes. This helps extract minerals from the bones. Because the broth contains vinegar and simmers for several hours, enamelled cast iron is more suitable than bare cast iron: enamel is non-reactive, while prolonged exposure to acid may damage bare cast iron’s seasoned coating and affect the flavour.[6]
- 3
Heat slowly
Bring the liquid almost to a boil, then reduce the heat. The surface should move only slightly. During the first 30–45 minutes, skim off any foam with a spoon as needed.
- 4
Add your chosen variation
For the aromatic version, add the onion, carrots, celery, celeriac and garlic. For the stricter keto version, omit the vegetables. Add the bay leaf, cloves, pepper and selected herbs, but only a small amount of the salt.
- 5
Simmer very gently
Partially cover the pot and cook for 6–8 hours at the barest simmer. Add a little hot water if needed. Avoid unnecessary stirring, as vigorous boiling and stirring disperse fat and fine particles, producing a cloudier broth.
- 6
Strain and season
Strain the bone broth through a fine-mesh sieve. Adjust the salt only after straining, once you know its final concentration. For a less fatty broth, chill it first and remove the solidified layer of fat; you can save the fat for other cooking.
- 7
Cool quickly
Divide the bone broth among smaller, shallow containers and refrigerate it within two hours. Keep enough for 3–4 days in the refrigerator and immediately freeze the remainder in portions.[7]
Meal planning
One large batch, several uses
For a drink, heat only one serving to a boil, then allow it to cool to a pleasant drinking temperature. Prepared in a larger quantity, the broth becomes part of an everyday routine without needing to be cooked from scratch each day.
How I use it for slow-cooked beef
When slow-cooked beef is on my menu, I use the prepared bone broth as the cooking liquid. I choose a less tender cut that benefits from long, moist cooking—such as chuck, shank or a suitable round cut. The structure of the cut matters more than the label “lean”: a very tender, particularly lean cut may dry out when cooked too long, while the connective tissue in a less tender cut softens during slow cooking.[8][9]
- 500–700 g thawed beef in one piece
- 10 g beef tallow or olive oil for searing
- 500–750 ml prepared bone broth, or enough to surround the meat without necessarily covering it completely
- salt and pepper to taste
Pat the meat thoroughly dry, season it with salt and sear it on all sides in a very hot pan using 10 g fat, 6–8 minutes in total. Searing develops browned flavours; it does not “seal” the meat or lock the juices inside. Transfer it to a slow cooker or a tightly covered heavy pot, pour in the bone broth and cook on low for 6–8 hours. A larger cut or one with more connective tissue will often need closer to eight hours. Begin checking earlier and stop cooking when a fork slides into the meat easily and the fibres separate with little resistance. The precise time depends on the cut and its size.[8][9]
If any beef remains, cool it quickly, reheat it the following morning and serve it with poached eggs for breakfast. This turns the leftovers into a satisfying meal rich in protein and iron.
The role of each ingredient
Why these ingredients were chosen
Different bones
Marrow bones provide marrow and a richer flavour, meaty bones create a more pronounced beef base, and parts containing more cartilage and connective tissue offer a greater chance of gelling.
Vinegar
A small amount adds mild acidity; the recipe does not attribute specific health effects to it, although it helps extract minerals from the bones.
Gentle cooking
A barely perceptible simmer helps preserve a cleaner flavour and clearer appearance, while salting at the end reduces the risk of an overly salty result.
Beef and iron
Beef is a source of haem iron, which is generally absorbed better than non-haem iron from plant sources.[10]
Substitutions
Adapt the flavour and texture
- You may replace some or all of the beef bones with a chicken carcass, backs, necks or wings. The flavour will be lighter, while the amount of gelatine will depend on the selected parts.
- For a broth that gels more firmly, replace some of the marrow bones with parts richer in cartilage and connective tissue.
- For a less fatty result, remove the chilled fat. For a fuller flavour, retain some of it.
- For a more neutral base, omit the cloves and rosemary. Bay leaf and black pepper are usually sufficient for soups and sauces.
- If you use bare cast iron, choose enamelled cast iron or a good-quality stainless-steel pot instead because of the vinegar and long cooking time.[6]
Good to know
Frequently asked questions
How should I store the prepared broth?
Divide the bone broth among shallow containers, cool it quickly and refrigerate it within two hours. Store at no more than 4 °C and use within 3–4 days.[7]
Can I freeze the broth?
Yes. Freeze it in labelled portions of 250 ml, 500 ml or 1 l. For the best quality, use it within 2–3 months. Leave some room in the container because liquids expand as they freeze.[7]
Is this recipe keto?
The stricter version without onion and root vegetables is designed as a keto base. Because the composition of homemade bone broth is not standardised, we do not publish invented numerical carbohydrate values without laboratory analysis. The aromatic version contains more carbohydrates, but the amount in the strained liquid depends on the preparation.
Can I prepare the broth in advance?
Yes—that is the recipe’s central idea. Prepare one large batch for several days, keep enough for 3–4 days in the refrigerator and freeze the remainder. Then heat only the serving you need each day.
How should I reheat bone broth?
Heat only the amount you intend to use. Bring the bone broth to a boil when reheating, then allow it to cool to a pleasant drinking temperature.[7]
Does chilled bone broth have to gel?
No. Gelling depends on the amount of cartilage and other connective tissue, the ratio of bones to water, and the cooking time and temperature. It is not a reliable indicator of nutritional value or health benefits.[4][5]
Can bone broth replace a meal?
No. It can be a warm drink or the base of another dish, but it is not a nutritionally complete meal on its own.
Sources, methodology and limitations
The nutritional composition of homemade bone broth is not standardised. This text combines a practical method, institutional guidance and a limited explanation of the scientific literature; it is not individual medical advice.
- EFSA: Dietary Reference Values for sodium
- WHO: Healthy diet
- Culinary Institute of America: Basic Training — Stocks
- Alcock et al.: Bone broth and collagen precursors
- Zhang et al.: Operational parameters of bovine bone broths
- Lodge Cast Iron: Tips for Cooking Acidic Foods in Cast Iron in Le Creuset: How to Cook with Enameled Cast Iron
- FoodSafety.gov: Cold Food Storage Chart
- University of Nebraska–Lincoln Extension: Cooking Tenderness into Every Beef Cut
- USDA FSIS: Slow Cookers and Food Safety
- NIH Office of Dietary Supplements: Iron Fact Sheet
- World Cancer Research Fund: Limit red and processed meat
The Unwind thought
Preparing a larger quantity is a simple way to make a good decision easier to repeat. Bone broth itself does not guarantee recovery or weight loss; its value lies primarily in simplifying your routine and providing a warm base for the meals ahead.
Save this recipe
Homemade Bone Broth for Recovery
- 800 g bones of your choice
- 4 l ice-cold water
- 15–30 ml apple cider vinegar
Roast the bones, then simmer them with the water, vinegar and selected additions for 6–8 hours at the barest simmer. Strain, cool quickly and divide into portions.
THE UNWIND COMMUNITY
Cook with The Unwind
Follow along for practical keto recipes, meal-planning ideas and calm support for everyday nourishment.
Join